If your Ninja Creami ice cream maker is showing an install light that keeps blinking, you’re not alone. Many users find this little light confusing, especially if they’re new to the machine. While the Ninja Creami is famous for making delicious frozen desserts at home, a blinking install light can stop your fun very quickly. But don’t worry—this guide will walk you through what the blinking means, why it happens, and how you can fix it yourself. By the end, you’ll understand your machine better and know exactly what to do the next time this light starts blinking.
What Is The Ninja Creami Install Light?
The install light on the Ninja Creami is a small indicator on the front panel. Its main job is to tell you if the bowl and other parts are installed correctly before you start making ice cream. When everything is locked in place, the light stays solid. If something isn’t right, the light will blink, and the machine won’t start.
This safety feature is important. It prevents the motor from running if the bowl or paddle isn’t in place, which could damage the machine or cause injury. Even though it’s helpful, the blinking can be frustrating if you don’t know what to check.
Common Reasons The Install Light Blinks
Understanding why the install light blinks is the first step to solving the problem. Here are the most frequent causes:
- Bowl Not Fully Inserted: If the bowl isn’t pushed in all the way, the sensors won’t recognize it.
- Lid Not Locked: The lid must be locked tightly. If not, the machine thinks it’s unsafe to start.
- Paddle Not Installed: The paddle (also called the blade) needs to be attached properly to mix your dessert.
- Incorrect Assembly: Mixing parts from different Ninja Creami models can confuse the sensors.
- Obstructions: Food or dirt stuck in the locking mechanism can prevent a full connection.
- Damaged Parts: Cracked or bent parts may stop the machine from detecting proper installation.
- Electrical Issues: Rarely, a power surge or faulty outlet can cause the light to blink.
Let’s look at each reason in detail and how you can fix it.

Credit: www.youtube.com
Step-by-step Troubleshooting
Solving the blinking install light is usually simple if you check each part carefully. Here’s what to do:
1. Check The Bowl
Make sure the Creami bowl is pushed all the way into the base. Sometimes, even a small gap will cause the light to blink. Remove the bowl and insert it again, pressing firmly until you hear a click.
2. Inspect The Lid
The lid must be lined up and twisted until it locks. Look for arrows or marks that show proper alignment. If the lid feels loose or doesn’t lock, remove it and try again. Check for any debris or food stuck in the grooves.
3. Confirm The Paddle Is In Place
The paddle should fit securely inside the lid. If it’s not installed, the machine won’t work. Remove the lid and check the paddle. Make sure it’s snapped into place and spins freely.
4. Use The Correct Parts
Ninja Creami has several models, such as the NC300 and NC301. Their bowls and lids may look similar but are not always compatible. Mixing parts from different models can confuse the sensors. Double-check that all your parts are made for your machine.
5. Look For Obstructions
Even small bits of food or ice can block the sensors. Carefully clean the bowl rim, lid lock, and base. Use a damp cloth or a small brush to remove any build-up.
6. Examine For Damage
Check for cracks, bends, or worn-out areas on the bowl, lid, and paddle. Damaged parts might not fit tightly, causing the light to blink. If you spot damage, you may need to order a replacement.
7. Test The Power Source
Unplug the machine and plug it into a different outlet. Avoid using extension cords, as they can cause power drops. After plugging back in, try again.
8. Reset The Machine
Sometimes, the electronics just need a reset. Unplug the Ninja Creami for one minute, then plug it back in. This often clears any lingering error signals.
How The Install Light Works: Sensor Technology
The Ninja Creami uses small safety sensors to check if the bowl and lid are in place. If the sensors don’t detect a proper connection, the install light will blink. Here’s a quick comparison of two popular Ninja Creami models and their sensor systems:
| Model | Sensor Type | Common Issues |
|---|---|---|
| NC300 Series | Mechanical Lock | Bowl not aligned, lid loose |
| NC301 Series | Electronic Sensor | Electrical reset needed |
If you know which model you have, it’s easier to figure out if the problem is mechanical (physical alignment) or electronic (sensor malfunction).
When The Problem Is More Serious
Most blinking install light issues are easy to fix. However, sometimes the cause is more serious:
- Sensor failure: If the internal sensors are broken, the machine may need professional repair.
- Broken locking mechanism: If the latch won’t close or is stuck, contact Ninja customer support.
- Repeated blinking after all checks: If you’ve tried everything and the light still blinks, don’t force the machine. Using it with faulty sensors is unsafe.
Here’s a quick look at when to DIY and when to call for help:
| Issue | DIY Fix | Call Support |
|---|---|---|
| Bowl not inserted | ✔ | |
| Lid alignment | ✔ | |
| Sensor failure | ✔ | |
| Broken parts | ✔ |
Preventing Future Blinking Problems
You can avoid most install light issues by taking care of your Ninja Creami and following a few simple habits:
- Assemble parts gently: Forcing the bowl or lid can bend sensors and locks.
- Clean regularly: Wipe the machine after every use, focusing on the lock areas.
- Dry thoroughly: Water left in the locking mechanism can affect sensors.
- Check for wear: Every few months, look for cracks or bent parts.
- Use the right accessories: Only use official Ninja Creami bowls, lids, and paddles for your model.
A tip that many users miss: store your Creami with the bowl and lid slightly separated. This reduces stress on the locking system and helps parts last longer.

Credit: healthyslowcooking.com
Ninja Creami Error Lights: What Each One Means
The install light isn’t the only signal on your Ninja Creami. Here’s a quick reference for other lights you might see:
| Light | Meaning | What to Do |
|---|---|---|
| Install Light (Blinking) | Parts not installed correctly | Check bowl, lid, paddle |
| Power Light (Solid) | Ready to use | Choose your program |
| Error Light | Mechanical or sensor problem | Unplug and reset |
| Progress Light | Running a program | Wait for finish |
Understanding these signals can save you time and make your dessert-making smoother.
Real-world Example: Solving A Persistent Install Light
Let’s look at an example. Sarah bought a Ninja Creami NC301. On her third use, the install light started blinking. She checked the bowl and lid, but the light stayed on. After cleaning the parts, she still had the problem.
What she missed: a small crack in the lid that prevented a tight fit. Once she replaced the lid with an official Ninja part, the blinking stopped. This shows how even a tiny issue can trigger the install light—and why careful inspection is important.
When To Replace Parts
If you’ve tried all the steps and the install light still blinks, it may be time to replace a part. Common replacement needs include:
- Lids that won’t lock
- Bowls with cracked rims
- Paddles that are worn or bent
Always buy parts from the official Ninja store or trusted retailers. Using unofficial parts can lead to more problems, as they may not fit exactly or could damage the sensors.
Ninja Creami Maintenance Tips
Proper care can help you avoid install light problems and extend the life of your machine. Here are a few non-obvious tips:
- Rotate your bowls and lids: If you own extras, use them in rotation to reduce wear.
- Avoid freezer overfill: Don’t fill your bowl above the max line—ice can push on the lid and sensors.
- Let frozen bowls thaw a few minutes: If you take a bowl straight from the freezer, let it sit at room temperature for 2-3 minutes. This helps the locking system work smoothly and prevents cracks.
These habits can make a big difference, especially if you use your Creami often.
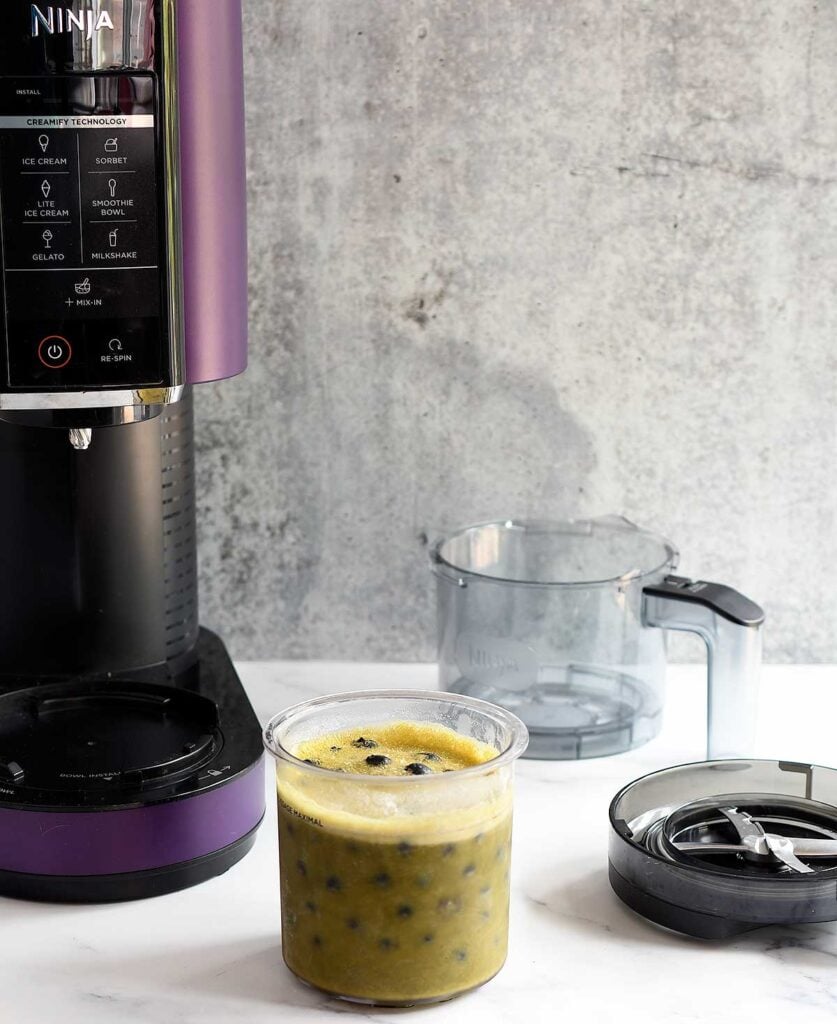
Credit: healthyslowcooking.com
Comparing Ninja Creami To Other Ice Cream Makers
How does the Ninja Creami’s install light system compare to other brands? Here’s a quick comparison:
| Brand | Install Light | Common User Issue |
|---|---|---|
| Ninja Creami | Yes | Bowl/lid not detected |
| Cuisinart | No | Overfilling, noisy motor |
| Breville | Yes | Sensor errors, lid issues |
Ninja’s safety system is more sensitive than most, which means it’s safer but sometimes more likely to stop over small issues. This is good for protecting your machine, but it also means you need to be precise with assembly and cleaning.
Extra Guidance For Beginners
Many first-time Ninja Creami users overlook two important things:
- The “click” sound: When you install the bowl or lid, listen for a clear click. This sound means the part is truly locked in. If you don’t hear it, check alignment.
- Bowl orientation: The bowl fits in only one direction. Look for small arrows or notches to guide placement. Turning it the wrong way is a common beginner mistake.
Remember, these simple checks can save you frustration and protect your machine.
Getting Professional Help
If you’ve tried every step and the install light keeps blinking, it’s time to contact Ninja customer support. Have your model number and proof of purchase ready. Most Ninja Creami models come with a one-year warranty, and Ninja’s support team can guide you through advanced troubleshooting or arrange repairs.
You can find official support at the Ninja Kitchen Support website.
Frequently Asked Questions
Why Does My Ninja Creami Install Light Keep Blinking Even After I Reassembled Everything?
If the light keeps blinking after reassembly, check for cracks or wear on the bowl and lid. Clean all contact points, and ensure you’re using the correct parts for your model. If the issue continues, a sensor might be damaged.
Can I Use Third-party Bowls Or Lids With My Ninja Creami?
No, you should only use official Ninja parts. Third-party parts may not fit exactly and can cause the install light to blink or even damage the sensors.
Is The Blinking Install Light Dangerous?
No, the blinking light itself is not dangerous—it’s a safety feature. However, forcing the machine to run with blinking lights can damage the motor or sensors.
How Often Should I Clean The Sensors And Lock Mechanisms?
Wipe down the bowl rim, lid, and lock areas after every use. Deep clean once a week if you use the Creami often. This reduces the chance of install light issues caused by build-up.
What Should I Do If My Machine Is Still Under Warranty And The Install Light Won’t Stop Blinking?
Contact Ninja customer support. They may guide you through more troubleshooting or offer a replacement if a hardware problem is found.
A blinking install light on your Ninja Creami can be annoying, but it’s usually easy to fix with careful checks and good habits. With the right approach, you’ll spend less time troubleshooting and more time enjoying your favorite frozen treats.