When you run performance tests with Blazemeter, you expect everything to work smoothly. But sometimes, you notice Blazemeter is not recording JMX files. JMX files are crucial—they store your test scripts, including requests, variables, and test logic. If Blazemeter isn’t capturing them, your testing process breaks down. Let’s explore why this happens, how to fix it, and what you can do to avoid it in the future. This guide explains the problem in simple terms, shares practical solutions, and gives tips for beginners and experienced testers alike.
Why Blazemeter Not Recording Jmx Is A Problem
A JMX file is the backbone of your JMeter test. It contains all your test settings, so you can re-run, edit, or share your test easily. If Blazemeter doesn’t record it:
- You can’t review or debug your test script.
- Test results might be unreliable or missing key details.
- Collaboration becomes harder, since you have nothing to share with your team.
This issue can waste hours and cause confusion, especially for new testers. Most people expect Blazemeter to record JMX files automatically, but that’s not always the case.
Common Reasons Blazemeter Doesn’t Record Jmx Files
Understanding why Blazemeter fails to record JMX files helps you fix the issue faster. Here are the main causes:
1. Incorrect Test Upload
Sometimes, testers upload files in the wrong format. Blazemeter only recognizes valid JMX files created by Apache JMeter.
2. Blazemeter Recorder Settings
If you use Blazemeter’s browser recorder, it might save tests in a different format (like HAR) unless you specifically export to JMX.
3. Jmeter Version Mismatch
Using an unsupported JMeter version can cause compatibility issues. Blazemeter may fail to recognize or record the JMX file.
4. File Corruption
If your JMX file is corrupted, Blazemeter won’t record it. This can happen if the file is edited manually or during conversion.
5. Network Or Browser Issues
Sometimes, network interruptions or browser problems cause incomplete uploads.
6. Project Configuration Errors
Wrong settings in your Blazemeter project can prevent proper recording.
7. Unsupported Elements In Script
If your script contains advanced or custom JMeter elements, Blazemeter may not handle them well.
Let’s look deeper at a few of these causes with practical examples.
Example: Jmeter Version Mismatch
Suppose you create your test in JMeter 5. 4. 1, but Blazemeter only supports up to 5. 3. When you upload, Blazemeter can’t process the file. You see errors or your JMX isn’t recorded.
Example: File Corruption
You edit your JMX file in a text editor, but accidentally delete a closing tag. When you try to upload, Blazemeter refuses to record it, or records an incomplete script.
How To Fix Blazemeter Not Recording Jmx
Solving this issue is straightforward if you follow these steps:
1. Check Jmx File Format
- Make sure your file ends with .jmx.
- Confirm it was created with Apache JMeter, not another tool.
- Avoid editing the file in a text editor—use JMeter only.
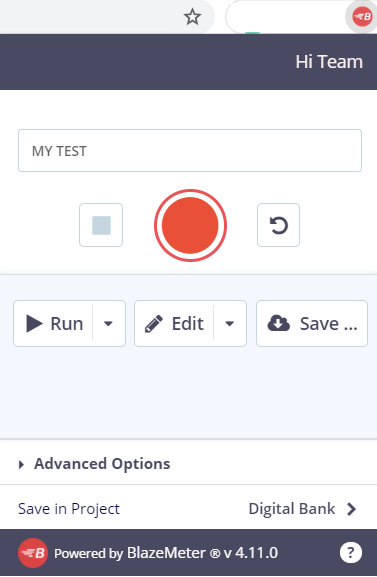
2. Export Correctly From Recorder
If you use the Blazemeter Chrome extension:
- After recording, click “Export.”
- Choose JMX format, not HAR or CSV.
- Save the file to your computer.
3. Use Supported Jmeter Versions
Blazemeter supports specific JMeter versions. Check their documentation to see which versions are allowed. If your version is too new or too old, download the correct one and recreate your script.
Here’s a comparison of supported JMeter versions:
| JMeter Version | Blazemeter Support |
|---|---|
| 5.1 | Supported |
| 5.2 | Supported |
| 5.3 | Supported |
| 5.4.1 | Partially Supported |
| 5.5 | Not Supported |
4. Avoid Corrupted Files
To prevent corruption:
- Always use JMeter’s GUI to create and edit scripts.
- Save your file before uploading.
- If you suspect corruption, open the file in JMeter and check for errors.
5. Fix Network And Browser Issues
- Use a stable internet connection.
- Clear your browser cache.
- Try uploading from a different browser or computer.
6. Review Project Configuration
- Make sure your Blazemeter project allows JMX uploads.
- Check for any restrictions or limits on file size.
7. Remove Unsupported Elements
Some JMeter plugins or custom elements are not supported by Blazemeter. If your test uses them, remove or replace these elements before uploading.
Step-by-step Guide: Recording A Jmx File In Blazemeter
If you’re new to Blazemeter, here’s a simple guide:
- Open Apache JMeter and create your test plan.
- Save your test as a .jmx file.
- Go to Blazemeter and click “Create Test.”
- Choose “Upload JMX” and select your file.
- Wait for Blazemeter to process the file. Look for any errors or warnings.
- If successful, your test is ready to run.
If you use the Blazemeter Recorder:
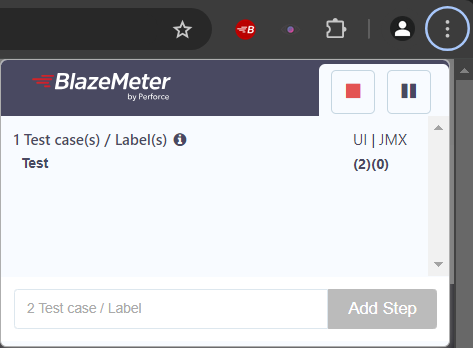
- Record your session in the browser.
- Click “Export.”
- Choose JMX and save.
- Follow steps 3-6 above.
Common Mistakes Beginners Make
Many new testers make these errors:
- Uploading HAR files instead of JMX.
- Using old or unsupported JMeter versions.
- Forgetting to export their recordings as JMX.
- Adding unsupported elements (like custom plugins).
Avoiding these mistakes saves time and frustration.
Advanced Troubleshooting For Jmx Recording Issues
If you still have problems, try these advanced steps:
1. Validate Your Jmx File
Open your JMX file in JMeter. Run the test locally. If errors appear, fix them before uploading to Blazemeter.
2. Check File Size Limits
Blazemeter has upload limits, usually around 10MB. Large test scripts with many elements may exceed this. Try splitting your test into smaller parts.
3. Review Blazemeter Logs
When you upload a JMX file, Blazemeter shows logs and error messages. Read these carefully. They often point to the exact issue.
4. Contact Blazemeter Support
If nothing works, reach out to Blazemeter support. Provide details like your JMX file, JMeter version, browser, and error messages. This helps them solve your problem quickly.
Data: How Often Do Jmx Recording Issues Occur?
Based on user forums and Blazemeter’s own reports, JMX recording issues happen in about 15–20% of first-time uploads. Most problems are fixed with correct file formats and supported JMeter versions.
Here’s a simple breakdown:
| Issue Type | % of Cases |
|---|---|
| Wrong File Format | 40% |
| JMeter Version Mismatch | 25% |
| File Corruption | 20% |
| Other (Network, Config) | 15% |
Beginners often underestimate the importance of proper file format and version. Testing locally before uploading catches most issues early.
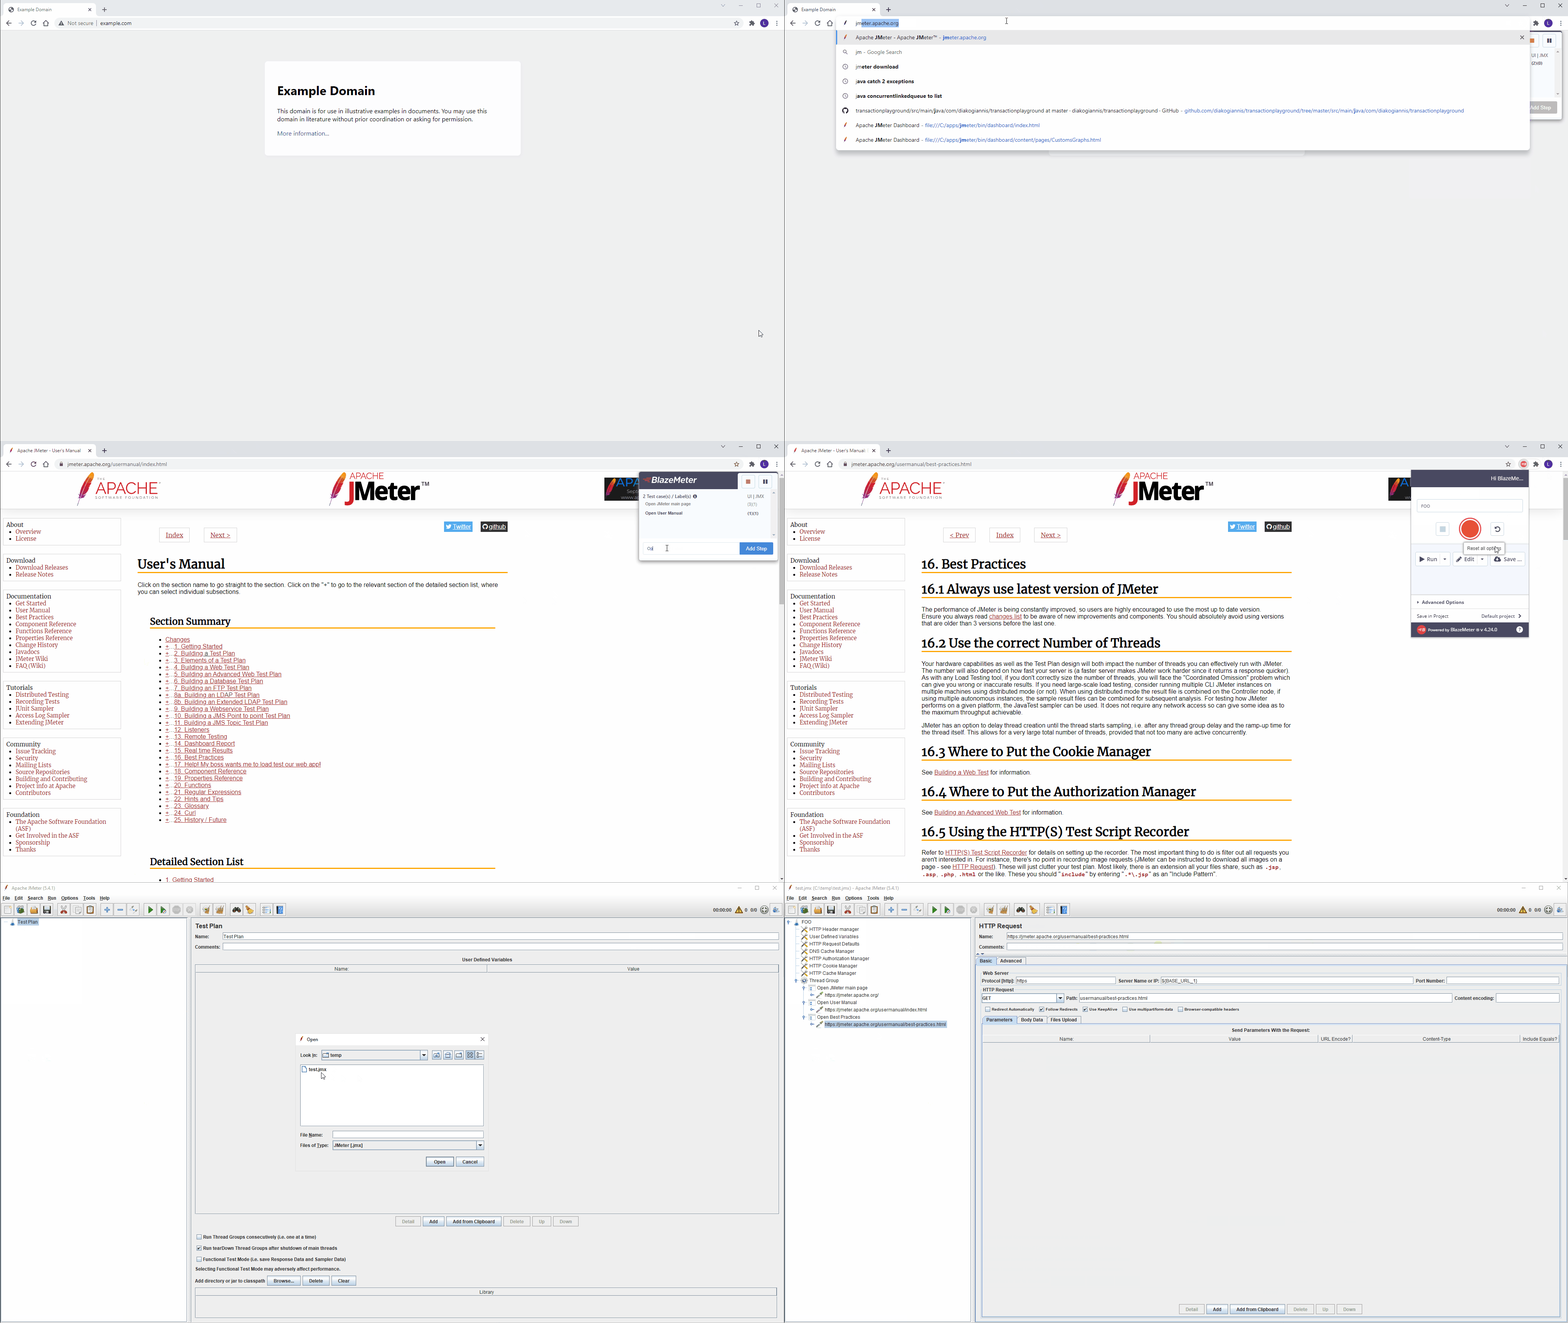
Credit: groups.google.com
Best Practices To Avoid Jmx Recording Issues
To keep your tests running smoothly in Blazemeter, follow these tips:
1. Always Use Supported Jmeter Versions
Check Blazemeter’s documentation before starting.
2. Export Recordings As Jmx
If you use the browser recorder, select JMX format every time.
3. Validate Scripts In Jmeter Before Upload
Run tests locally and check for errors.
4. Avoid Custom Plugins
Stick to standard JMeter elements for better compatibility.
5. Keep Files Small And Organized
Split large tests into smaller scripts. This improves upload success.
6. Document Your Test Plan
Write down which JMeter version you used, plugins, and steps. This helps troubleshoot later.
7. Backup Your Jmx Files
Save copies in cloud storage or version control.
These practices help you build reliable performance tests and avoid wasted time.
Real-world Example: Fixing A Jmx Recording Issue
Let’s look at a true scenario. Sara, a tester, tried uploading her JMX file to Blazemeter. She got an error: “Unsupported elements found.” Sara had used a custom JMeter plugin for advanced request handling. Blazemeter doesn’t support this plugin.
Sara fixed the issue by:
- Removing the custom plugin from her script.
- Using only standard JMeter components.
- Saving and re-uploading her JMX file.
Her test recorded successfully. Sara also learned to check compatibility before adding plugins.
Credit: help.blazemeter.com
How Blazemeter Compares To Other Testing Tools
Blazemeter is popular, but how does it stack up against alternatives for JMX recording?
| Tool | JMX Recording Support | Common Issues |
|---|---|---|
| Blazemeter | Yes | File format, version mismatch |
| Apache JMeter | Native | Manual errors |
| LoadRunner | No | Different script format |
| Gatling | No | Does not use JMX |
Blazemeter is one of the few cloud tools that supports JMX files directly, but it’s sensitive to file format and version. Other tools may require script conversion or manual setup.
Non-obvious Insights For Beginners
1. Script Complexity Matters
Beginners often pack too many elements into one JMX file. Keeping scripts simple increases compatibility and reduces errors.
2. Blazemeter Is Strict About File Structure
Even small mistakes in XML structure cause recording issues. Use JMeter’s GUI for editing—never a text editor.
These insights help you avoid hidden traps and build better tests.
Credit: help.blazemeter.com
Frequently Asked Questions
Why Does Blazemeter Reject My Jmx File?
Blazemeter rejects files if they’re not valid JMX format, use unsupported JMeter versions, or include unsupported elements. Check your file in JMeter before uploading and avoid custom plugins.
Can I Convert A Har File To Jmx For Blazemeter?
Yes, Blazemeter’s browser recorder lets you export as HAR or JMX. Always choose JMX format for upload. Converting HAR to JMX manually is risky and may break your script.
How Do I Know Which Jmeter Version To Use?
Check Blazemeter’s official documentation for supported versions. Usually, versions 5. 1–5. 3 work best. Using unsupported versions can cause upload errors.
What Should I Do If My Jmx File Is Corrupted?
Open your file in JMeter and look for errors. If it doesn’t load, recreate your script using JMeter’s GUI. Avoid editing the XML manually, as this often leads to corruption.
Is There A Way To Get Help From Blazemeter?
Yes, Blazemeter offers support through their website. You can contact them with your issue. Sharing your JMX file and error logs helps them solve the problem faster. Find more guidance at Blazemeter Official Site.
Blazemeter is powerful, but it demands careful handling of JMX files. Understanding the reasons behind recording issues, following best practices, and knowing where to get help will keep your performance tests running smoothly. By paying attention to file format, version, and script structure, you’ll avoid most problems—and make your testing process easier and more reliable.