A ceiling fan with a built-in light can make any room feel more comfortable and functional. Hunter ceiling fans are especially popular for their reliability, style, and quiet operation. But what happens when the light on your Hunter ceiling fan suddenly stops working? Whether you use the fan light daily or only occasionally, a malfunction can be frustrating and inconvenient. The good news is, most Hunter ceiling fan light problems are fixable—even if you’re not an electrician.
This guide takes you through the common reasons why a Hunter ceiling fan light might not work, how to diagnose the issue, and step-by-step solutions. You’ll learn simple troubleshooting methods, safety tips, and when it’s better to call a professional.
If you want your fan light shining again as quickly as possible, you’re in the right place.
Why Hunter Ceiling Fan Lights Stop Working
Before grabbing your tools, it helps to know the main causes behind a non-working ceiling fan light. Understanding the problem can save time, money, and effort.
Common Causes
- Burnt-out bulbs: This is often the simplest issue. Even new bulbs can sometimes fail early.
- Loose bulbs or sockets: Over time, vibrations from the fan can loosen bulbs or sockets.
- Faulty remote or wall switch: If your fan uses a remote or dedicated wall control, these can wear out or lose connection.
- Tripped circuit breaker: Sometimes, the circuit supplying power to your fan trips or blows a fuse.
- Wiring issues: Loose wires, bad connections, or aging wiring in the fan or ceiling can cut power to the light.
- Defective light kit: The light fixture or “kit” can fail due to internal faults.
- Faulty pull chain: Many Hunter fans use a pull chain to control the light; these sometimes break or disconnect.
- Blown capacitors: Some fan lights use a capacitor for dimming or switching, which can fail.
- Remote receiver failure: For remote-controlled fans, the receiver inside the fan can fail.
- Incorrect installation: Mistakes during installation can lead to poor connections.
Why These Problems Happen
Hunter ceiling fans are built to last, but age, humidity, dust, and electrical surges can take their toll. Frequent use of the fan and light increases wear on switches, sockets, and internal wiring. In some cases, problems appear shortly after installation due to mistakes or defective parts.
Non-obvious insight: Many people overlook the fact that ceiling fan vibrations can gradually loosen wires and bulbs—even if everything worked perfectly at first.
Initial Checks: Quick Things To Try First
Sometimes, the simplest solution is the one that works. These quick checks can solve many Hunter ceiling fan light problems in minutes.
- Try a new bulb: Test with a bulb you know works. Even if the old bulb looks fine, it may be burnt out.
- Check the wall switch: Make sure the switch controlling the light is ON. Sometimes, a dimmer or three-way switch is involved—try toggling it.
- Test the remote: Replace the remote battery and make sure you’re pressing the correct button. Double-check the light is selected, not just the fan.
- Inspect the pull chain: If your fan uses a pull chain for the light, gently pull it and listen for a click. If it feels stuck or loose, it may be broken inside.
- Reset the breaker: Go to your main electrical panel, find the circuit breaker for the fan, and flip it OFF then ON.
If these steps fix the problem, you’re done! If not, it’s time to dig deeper.

Credit: www.reddit.com
Safety First: How To Work Safely Around Ceiling Fans
Before you open or touch anything electrical, remember that safety comes first. Improper handling can cause shock, injury, or damage.
Key safety steps:
- Turn off the fan and light at the wall switch.
- Shut off power at the circuit breaker before opening the fan or light kit.
- Use a voltage tester to double-check that no power is present.
- If you’re not comfortable working with electricity, call a qualified electrician.
Non-obvious insight: Even if the wall switch is off, some ceiling fans can still have live wires due to wiring quirks. Always check at the breaker.
Diagnosing The Problem: Step-by-step Troubleshooting
Fixing a Hunter ceiling fan light is often a process of elimination. The steps below go from simplest to most complex. Work through them in order for best results.
1. Check The Bulbs And Sockets
- Remove the light bulb(s) and inspect for blackening, broken filaments, or white residue inside the glass. These are signs the bulb is burnt out.
- Try a new, working bulb in each socket.
- With the power OFF, gently wiggle each socket and bulb. If the socket feels loose or moves, it may need tightening or replacement.
2. Inspect The Light Kit Wires
- Remove the light kit cover. This usually involves unscrewing a few small screws.
- Look for loose, disconnected, or burnt wires.
- Tug gently on each wire connection. If a wire comes out, it was not connected securely.
- Check for melted wire insulation, a sign of overheating.
3. Test The Wall Switch And Remote
- If your fan uses a wall switch, remove the switch cover and check for loose wires.
- For remote-controlled fans, open the battery compartment and replace with fresh batteries.
- Try operating the light with both the wall switch and the remote (if both are present).
4. Check The Pull Chain
- If the pull chain is stuck, won’t pull, or spins freely, it may be broken inside the switch.
- With the power OFF, remove the light kit and inspect the pull chain mechanism for damage or disconnected wires.
5. Check The Circuit Breaker And Power Supply
- In your main breaker panel, make sure the breaker for the fan is ON.
- If you find a tripped breaker, reset it. If it trips again, there may be a short circuit.
- Use a voltage tester to confirm there is power at the wires inside the fan canopy.
6. Examine The Fan’s Internal Wiring
- Remove the fan canopy (the part that covers the ceiling mount) and inspect the wiring.
- Look for loose wire nuts, disconnected wires, or signs of arcing (burn marks).
- Check that all wires are firmly joined and insulated.
7. Inspect The Remote Receiver (if Present)
- Many modern Hunter fans use a receiver inside the fan to accept remote commands.
- With the power OFF, locate and remove the receiver (usually a small black or white box).
- Check for burn marks, melted plastic, or loose connectors.
- Some receivers have a reset button—try resetting if available.
8. Test The Light Kit Separately
- Disconnect the light kit from the fan (usually just unplugging a connector).
- Connect the light kit wires directly to a known live power source (if you are comfortable and safe doing so).
- If the light works, the problem is in the fan wiring or controls. If not, the light kit itself is defective.
9. Test The Capacitor
- Some Hunter fans use a capacitor in the light circuit, especially for dimming.
- If all else fails, replace the capacitor with a new, matching unit.
Tip: Take photos of wiring before disconnecting anything. This helps you reconnect everything properly.
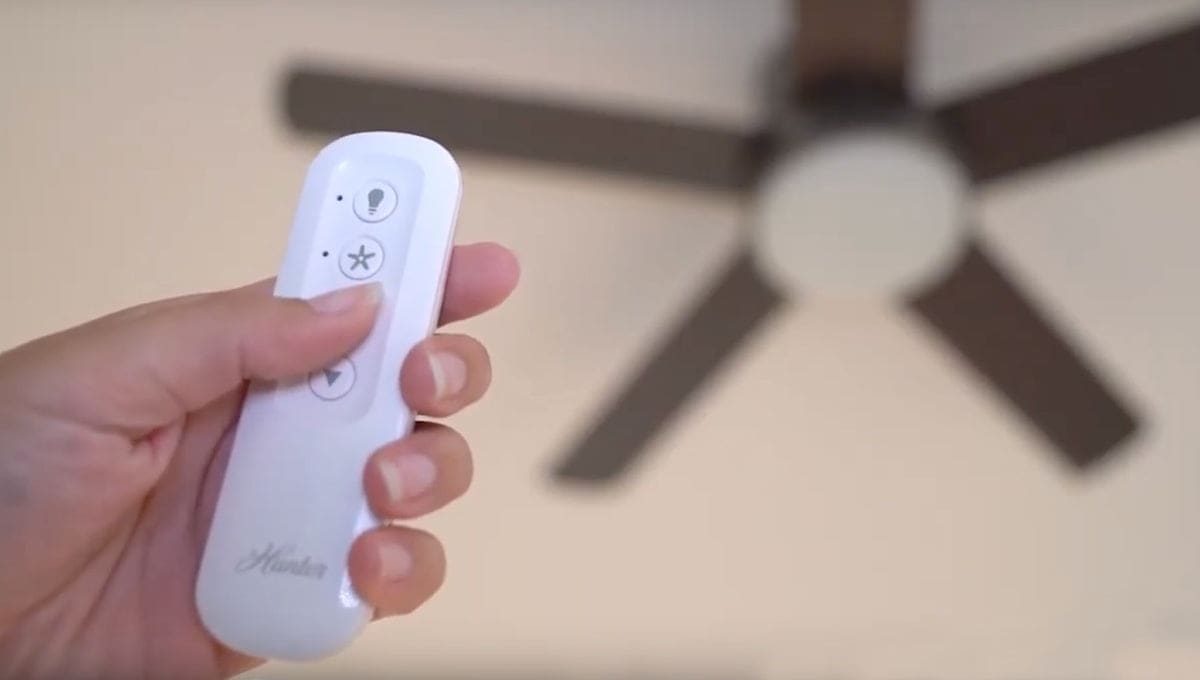
Credit: www.hunterfan.com
Understanding Hunter Ceiling Fan Wiring
Knowing how your Hunter ceiling fan is wired can make troubleshooting much easier. Here’s a simple overview.
Typical Hunter Ceiling Fan Light Wiring
A standard Hunter fan with a light kit usually has these wires:
- Black: Fan power
- Blue: Light power
- White: Neutral
- Green/Bare: Ground
The house wires (from your ceiling) are usually:
- Black or Red: Hot (power)
- White: Neutral
- Green or Bare: Ground
The blue wire from the fan is what powers the light kit. If this wire is loose or disconnected, the light will not work—even if the fan spins.
Simple Wiring Diagram
Here’s a basic wiring layout:
| House Wire | Fan Wire | Purpose |
|---|---|---|
| Black | Black | Fan motor |
| Black/Red | Blue | Light kit |
| White | White | Neutral |
| Green | Green/Bare | Ground |
Note: Some older homes may use different color codes. Always check your fan’s instruction manual.
Common Wiring Mistakes
- Connecting the blue (light) wire to the wrong house wire.
- Forgetting to connect the blue wire at all.
- Loose wire nuts or poorly twisted wires.
- Reversed neutral and hot connections.
Practical tip: When in doubt, label each wire with tape as you disconnect them. This prevents confusion during reassembly.
How To Fix The Most Common Problems
Based on hundreds of real-world cases and Hunter’s own support data, these are the most frequent problems and how to solve them.
Burnt-out Bulbs
- Replace with a new, compatible bulb.
- Check wattage limits (usually marked inside the light kit). Over-wattage bulbs can cause overheating and failure.
Loose Bulbs Or Sockets
- Tighten the bulb, but don’t over-tighten.
- If the socket itself is wobbly, tighten its mounting screws (power OFF first).
- Replace the socket if it’s cracked or burned.
Bad Pull Chain
- Buy a replacement pull chain switch (Hunter sells these online and in hardware stores).
- Remove the light kit, unscrew the old switch, and install the new one.
- Connect wires exactly as before (photos help).
Faulty Remote Or Wall Switch
- Replace the remote batteries.
- If the wall switch feels hot, replace it—it may be failing.
- For remote control fans, try turning the wall switch OFF/ON, then use the remote.
Light Kit Failure
- If the light kit itself is dead (no light even when directly powered), replace the entire kit.
- Hunter sells replacement light kits for most models.
Receiver Or Capacitor Problems
- If the fan works but the light does not (and the bulb is good), the receiver or capacitor may be faulty.
- Receivers can be replaced with Hunter-compatible units.
- Capacitors must match the original specs (voltage, microfarad rating).

Credit: www.youtube.com
Upgrading To Led Bulbs: Considerations
Many people switch their ceiling fan bulbs to LED for energy savings and longer life. This is usually a good idea, but there are a few things to know.
Benefits Of Led Bulbs
- Lower energy use: LEDs use up to 80% less energy than incandescent bulbs.
- Long life: Quality LEDs can last 10,000+ hours.
- Cooler operation: LEDs produce less heat, reducing fire risk.
Possible Issues
- Some older Hunter fans or remotes may not work well with certain LED bulbs (dimming problems, flicker, etc. ).
- If your fan’s remote or dimmer is not LED-compatible, look for “dimmable” LEDs or upgrade the remote.
Compatibility Table
Here’s a quick look at bulb types and Hunter fan compatibility.
| Bulb Type | Hunter Fan Compatibility | Notes |
|---|---|---|
| Incandescent | Fully compatible | Standard for most models |
| CFL | Partial | Not all remotes/dimmers work well |
| LED | High | Use dimmable LEDs if dimmer is present |
Tip: Always check the bulb’s base and wattage before buying replacements.
When To Call A Professional
Most Hunter ceiling fan light problems can be solved by careful DIY work. But sometimes, it’s safer and faster to call an electrician.
Signs You Need Help
- You smell burning plastic, see smoke, or notice scorch marks.
- The breaker trips repeatedly when the fan or light is used.
- Wires are badly burned or melted.
- You’re uncomfortable or unsure about electrical work.
A pro can quickly find and fix wiring faults, replace defective light kits, or upgrade your setup for LED compatibility. It’s better to be safe than sorry with electrical repairs.
Preventing Future Problems
Once your Hunter ceiling fan light is working again, a little maintenance can keep it shining for years.
Maintenance Tips
- Clean regularly: Dust the fan and light kit to prevent overheating and improve airflow.
- Tighten bulbs and screws: Vibrations can loosen components over time.
- Check wiring every few years: Especially in humid or dusty environments.
- Use proper bulbs: Stick to the wattage and base type recommended by Hunter.
- Replace batteries in remotes yearly: Avoid remote failures by swapping batteries before they die.
Why Maintenance Matters
Regular care prevents most common issues and helps your fan and light operate efficiently. Many people ignore ceiling fans until something breaks; a few minutes of attention each year can save hours of frustration later.
Hunter Ceiling Fan Light Kits: What To Know
Sometimes, the best fix for a non-working light is replacing the entire light kit. Hunter offers a range of replacement light kits for their fans.
Choosing A Replacement Light Kit
- Check your fan model: Not all light kits fit every Hunter fan. Find your model number (usually on the motor housing).
- Match style and finish: Hunter sells kits in different finishes (white, bronze, brushed nickel, etc. ).
- Decide on bulb type: Choose LED-compatible kits for energy savings.
- Look for warranty: Hunter’s light kits usually come with a warranty—register your purchase.
Average Cost
Light kit prices range from $30 to $100+, depending on style and features. Installation takes 15–30 minutes for most fans.
Common Buyer Mistakes
- Buying a kit for the wrong fan model.
- Forgetting to check bulb compatibility.
- Not matching finish to the fan.
- Not reading installation instructions.
Tip: If your fan is under warranty, contact Hunter support before buying parts. They may offer free or discounted replacements.
Real-life Example: Fixing A Hunter Fan Light
Let’s look at a typical scenario:
Situation: The light on a Hunter ceiling fan in a bedroom stopped working. The fan still spins fine. Changing the bulbs did not help.
Diagnosis Steps:
- Checked the wall switch—OK.
- Replaced remote batteries—no change.
- Removed the light kit cover and inspected wires—found a blue wire had come loose.
- Turned power OFF, reconnected and tightened the blue wire.
- Turned power ON; light now works perfectly.
Lesson: Even if the bulbs and switches seem fine, a single loose wire can cut power to the light. Always check all connections.
Comparison: Hunter Ceiling Fan Light Vs. Other Brands
How does Hunter stack up when it comes to light kit reliability and ease of repair?
| Brand | Light Kit Reliability | DIY Friendliness | Parts Availability |
|---|---|---|---|
| Hunter | High | High | Excellent |
| Hampton Bay | Medium | Medium | Good |
| Harbor Breeze | Medium | High | Average |
| Westinghouse | Medium | Medium | Average |
Hunter stands out for replacement part availability and clear instructions, making DIY repairs easier.
Troubleshooting Modern Hunter Smart Fans
Newer Hunter fans may include smart features, such as app control, Wi-Fi, and voice assistant compatibility. These add convenience but can also introduce new troubleshooting steps.
Special Issues With Smart Fan Lights
- App not controlling light: Ensure both the fan and light are connected in the app. Re-pair if needed.
- Wi-Fi problems: Power cycling the fan and router often helps.
- Firmware updates: Outdated firmware can cause features to stop working. Update via the Hunter app.
Smart Fan Light Tips
- Use only compatible bulbs and accessories.
- Keep your app and firmware updated.
- If all else fails, reset the fan to factory settings and reconfigure.
Practical note: Smart fans sometimes lose settings after a power outage. Restore them via the app.
Frequently Asked Questions
Why Does My Hunter Ceiling Fan Light Work Sometimes But Not Always?
This usually means there’s a loose connection or a problem with the pull chain, wall switch, or remote receiver. Vibrations can cause wires or connectors to loosen over time. Inspect all wiring and controls.
Can I Use Any Led Bulb In My Hunter Ceiling Fan?
Not all LED bulbs are suitable. Use dimmable LED bulbs if your fan has a dimmer or remote. Always check bulb size, base, and wattage recommendations in your fan’s manual.
My Ceiling Fan Light Flickers—what’s Wrong?
Flickering is often caused by loose bulbs, incompatible LED bulbs, or a failing remote receiver/dimmer. Try tightening the bulb, switching to a different bulb type, or replacing the remote receiver.
Is It Safe To Replace The Light Kit Myself?
If you turn off the power at the breaker and follow safety steps, replacing a light kit is safe for most DIYers. If you’re unsure, hire an electrician.
Where Can I Find Official Hunter Replacement Parts?
Hunter replacement parts, including light kits, are available on the Hunter Fan Company website and at major retailers. For more, see the official Hunter parts page.
If your Hunter ceiling fan light is not working, don’t panic. With a careful, step-by-step approach, you can solve most problems quickly and safely. Fixing it yourself can save money and give you confidence for future repairs. If you ever feel unsure, there’s no shame in calling an expert—your safety is always most important.
With the right troubleshooting and a little patience, you’ll have your fan light shining bright again in no time.