When your Emerson thermostat display stops working, it can feel like your whole home comfort system is down. Suddenly, you can’t see the temperature, set schedules, or change modes. It’s frustrating, especially when you rely on your thermostat to keep your environment just right. Many people immediately think they need a new unit, but that’s not always the case. In reality, most display issues have simple causes and solutions.
This article will guide you through the most common reasons why an Emerson thermostat display might go blank or become unresponsive. Whether you’re a homeowner, a renter, or helping a friend, you’ll learn how to diagnose the problem and decide what to do next.
We’ll cover both basic and advanced troubleshooting, provide helpful comparison tables, and share tips from real-world experience. By the end, you’ll feel confident about your options and know when to call a professional.
Understanding Your Emerson Thermostat
Before fixing the problem, it helps to know a bit about Emerson thermostats. Emerson is a respected brand, making both basic and smart thermostats for homes and businesses. Models range from simple non-programmable units to advanced Wi-Fi connected devices. Most Emerson thermostats are powered by batteries, your home’s 24V system, or a mix of both.
The display is the main way to interact with your thermostat. It shows information like the current temperature, set points, system status, and error codes. When the display goes blank, you lose all this feedback, making it harder to control your system.
Common Emerson Thermostat Models
You may have one of these popular models:
- Emerson Sensi Touch (smart Wi-Fi)
- Emerson 1F78 (digital programmable)
- Emerson 1E78 (non-programmable)
- Emerson Blue Series
Each model has its own features, but the troubleshooting basics are similar. You’ll need to know your model number (usually found under the cover or on the back) for certain steps, especially if you contact support.
Main Reasons An Emerson Thermostat Display Stops Working
A blank or unresponsive display can happen for several reasons. Here are the most common:
- Dead or Weak Batteries
- Power Loss from HVAC System
- Loose or Broken Wiring
- Blown Fuse
- Tripped Safety Switches
- Dirty or Damaged Display
- Internal Component Failure
- Firmware or Software Glitches
- Extreme Temperatures or Moisture
- User Error or Settings Issues
Let’s look at each of these in detail.
1. Dead Or Weak Batteries
Many Emerson thermostats use AA or AAA batteries for power or backup. If these batteries run out, the display goes blank or flickers. Sometimes, the display may be dim or respond slowly before dying completely. Always check and replace batteries first—it’s the simplest fix.
2. Power Loss From Hvac System
Some thermostats get power from your home’s HVAC system, using a wire called the C-wire. If your furnace, air handler, or transformer stops working (for example, after a power outage), the thermostat loses power. This is especially common with smart thermostats, which need more power.
3. Loose Or Broken Wiring
Over time, thermostat wires can loosen or break due to vibration, poor installation, or rodents. Even one loose wire can shut off the display. This often happens after recent home repairs, renovations, or HVAC service.
4. Blown Fuse
Your furnace or air handler usually has a small 3-amp fuse on its circuit board. A blown fuse cuts power to the thermostat, making the display go dark. Fuses blow due to short circuits, incorrect wiring, or power surges.
5. Tripped Safety Switches
HVAC systems have safety switches (like float switches or high-limit switches) to prevent flooding or overheating. If one of these trips, it may cut power to the thermostat as a safety measure. Look for signs like water in the drain pan or error lights on your furnace.
6. Dirty Or Damaged Display
Dust, moisture, or direct sunlight can damage the display panel over time. Sometimes, cleaning the screen gently can restore visibility. In rare cases, the screen itself may fail due to age or manufacturing defects.
7. Internal Component Failure
Like any electronic device, a thermostat can develop internal faults. Failed capacitors, damaged circuits, or faulty solder joints can cause the display to stop working. These issues are harder to fix without replacing the thermostat.
8. Firmware Or Software Glitches
Some Emerson models, especially smart thermostats, can freeze or crash due to software bugs or updates. In these cases, the display may be blank, stuck, or show error codes. A reset or firmware update may help.
9. Extreme Temperatures Or Moisture
Thermostats are designed for indoor use. Exposure to very cold, hot, or humid conditions can cause temporary or permanent display problems. For example, a thermostat installed in a garage or sunroom may fail more often.
10. User Error Or Settings Issues
Sometimes, the issue is as simple as an accidentally changed setting. For example, the brightness may be set to the lowest level, or the display may be locked. Always check the manual before assuming a hardware problem.
How To Diagnose The Problem
Finding the real cause saves time and money. Here’s a step-by-step approach to diagnosing your Emerson thermostat display issue.
Step 1: Basic Visual Inspection
Look at the thermostat closely:
- Is the screen completely blank, dim, or flickering?
- Are there any error codes or symbols?
- Is the thermostat warm, wet, or damaged?
- Are there signs of recent HVAC work nearby?
Take note of these details—they’ll guide your next steps.
Step 2: Check For Battery Issues
- Remove the thermostat from its wall plate (most Emerson models pull off with gentle pressure).
- Look for the battery compartment.
- Replace old batteries with fresh, high-quality ones (check the manual for the correct type).
- Reattach the thermostat and see if the display comes back.
Tip: Always use batteries of the same brand and age. Mixing old and new batteries can cause display problems.
Step 3: Check Power From Hvac System
If your thermostat doesn’t use batteries, or if changing them doesn’t help:
- Make sure your furnace, air handler, or heat pump has power.
- Check your home’s breaker panel for any tripped breakers.
- Look for a light on the furnace’s circuit board—most have a small LED showing power.
Pro insight: If your HVAC system isn’t running at all, the thermostat display won’t work, either.
Step 4: Inspect Thermostat Wiring
- Turn off power at the breaker before removing the thermostat.
- Gently pull the thermostat from the wall to see the wiring.
- Look for any loose, broken, or disconnected wires.
- Check that each wire is securely attached to the correct terminal (matching the labels, like R, C, W, Y, G).
If you see corrosion or burnt wires, you may need professional help.
Step 5: Check For Blown Fuse
- Open the furnace or air handler panel (turn off power first).
- Find the small blade fuse on the circuit board (usually purple or orange, marked 3A).
- Remove and inspect the fuse. If the metal inside is broken, the fuse is blown.
- Replace only with an identical fuse (never use a higher rating).
Note: If the new fuse blows again, there’s a deeper wiring issue.
Step 6: Look For Tripped Safety Switches
- Check for water in the condensate drain pan (usually under the indoor unit).
- Look for a float switch (a small device with wires).
- Reset the switch if needed, but fix the root cause (like a clogged drain).
Step 7: Test For Display Or Internal Faults
If all wiring and power seem fine:
- Try resetting the thermostat (see your manual for the reset steps).
- If possible, test the thermostat on a friend’s system.
- If the display is still blank, the thermostat may be faulty.
Emerson Thermostat Troubleshooting Table
Here’s a quick reference for display problems and likely causes:
| Symptom | Possible Cause | Action |
|---|---|---|
| Blank display | Dead batteries, power loss, blown fuse | Replace batteries, check power/fuse |
| Dim display | Weak batteries, low voltage | Replace batteries, check wiring |
| Flickering screen | Loose wiring, battery contacts dirty | Secure wires, clean contacts |
| Error code | Software glitch, tripped switch | Reset unit, check system |
| Display works, no HVAC response | Wiring issue, blown fuse | Check connections, replace fuse |
Fixing The Problem: Step-by-step Solutions
Now that you’ve found the likely cause, here’s how to fix it.
Replacing Batteries
- Gently remove the thermostat from the wall.
- Open the battery compartment.
- Insert new, high-quality batteries in the correct orientation.
- Snap the thermostat back onto its base.
- Wait a few seconds for the display to turn on.
Extra tip: If the display is still blank after battery replacement, let it sit for 1-2 minutes before trying again.
Restoring Power To The Hvac System
- Check that all breakers and switches are ON.
- Reset any tripped breakers.
- If the HVAC system was recently serviced, confirm that the service switch is on.
Securing Or Replacing Thermostat Wires
- Turn off power at the breaker.
- Remove the thermostat from the wall.
- Tighten any loose wires with a small screwdriver.
- Replace damaged wires if needed (use similar gauge and color).
- Double-check that wires match the terminal labels.
Replacing A Blown Fuse
- Turn off power to the furnace or air handler.
- Remove the old fuse from the circuit board.
- Insert a new, identical 3-amp fuse.
- Restore power and check the thermostat display.
Resetting Tripped Safety Switches
- Empty the drain pan if water is present.
- Clear any blockages in the drain line.
- Reset the float switch (follow the manufacturer’s instructions).
- Restore power and test the display.
Cleaning The Display
- Use a soft, dry cloth to gently wipe the display.
- Never use water, spray cleaners, or abrasive materials.
- For stubborn marks, use a cloth barely dampened with isopropyl alcohol.
Resetting The Thermostat
- Find the reset button or follow the manual’s instructions (some require holding down specific buttons).
- Wait for the display to restart.
- Reprogram your settings if needed.
Upgrading Firmware (smart Models)
- Connect the thermostat to Wi-Fi (if not already connected).
- Use the Emerson app or web portal to check for updates.
- Follow on-screen prompts to update.
- Never interrupt power during a firmware update.

Credit: www.youtube.com
When To Replace The Thermostat
Sometimes, the best solution is a new thermostat. Here are signs that replacement is needed:
- The display stays blank after all troubleshooting steps.
- The thermostat is more than 10 years old.
- There is visible damage or corrosion.
- The unit no longer responds to resets or battery changes.
- You want new features (like Wi-Fi, remote control, or touch screen).
Modern Emerson thermostats are more energy-efficient and user-friendly. When buying a replacement, make sure it’s compatible with your HVAC system (single-stage, multi-stage, heat pump, etc. ).
Comparing Repair Vs. Replacement
Here’s a quick comparison to help you decide:
| Option | Upfront Cost | Time to Fix | Best For |
|---|---|---|---|
| Repair (DIY) | $0–$20 | 10–60 minutes | Simple battery, wiring, or fuse issues |
| Professional Repair | $75–$200 | 1–2 hours | Complex wiring or system faults |
| Replacement Thermostat | $40–$250 | 30–90 minutes | Old, damaged, or outdated thermostats |
Non-obvious insight: Many people try to fix a 15-year-old thermostat for hours, only to find a new model saves energy and pays for itself in a year.
Preventing Future Display Problems
Good maintenance can help you avoid display issues in the future.
- Change batteries every 6–12 months, even if the display still works.
- Keep the thermostat clean and dry. Avoid touching the screen with wet hands.
- Check wiring whenever you do home repairs or painting nearby.
- Test your HVAC system seasonally to catch issues early.
- Update firmware regularly if you have a smart model.
Extra tip: Write the battery change date on a sticker inside the cover for easy reference.

Credit: www.reddit.com
Common Mistakes To Avoid
- Forgetting to turn off power before handling wires. This can damage the thermostat and is dangerous.
- Using the wrong type of batteries or mixing old and new batteries.
- Skipping the fuse check if the display is blank after battery replacement.
- Not labeling wires before disconnecting them. Take a photo before you start.
- Ignoring small warning signs like flickering or dim displays, which often signal bigger problems ahead.
When To Call A Professional
Some problems are best left to HVAC experts. Call for help if:
- You’re not comfortable working with electricity or wiring.
- The display issue started after a major power surge or flood.
- The system blows fuses repeatedly.
- There’s a burning smell, smoke, or visible damage.
- Your heating or cooling system won’t run at all.
A licensed technician has tools to test voltages, diagnose board faults, and ensure safe operation.
Real-world Examples
Case 1: Sarah’s 1F78 thermostat suddenly went blank after a storm. She checked the batteries—still nothing. A quick inspection showed her furnace breaker had tripped. Resetting the breaker brought the display back instantly.
Case 2: Mike’s Sensi Touch lost its display after a DIY humidifier install. The cause? He accidentally disconnected the C-wire. Reattaching the wire fixed the problem.
Case 3: Priya’s display was always dim, even with new batteries. She found that the thermostat was installed near a drafty window, causing condensation inside the unit. Moving the thermostat to an interior wall solved her issue.
Non-obvious insight: Placement matters. Avoid installing thermostats near doors, windows, or direct sunlight, as this can cause both display and comfort issues.
Emerson Thermostat Model Comparison
If you decide to replace your thermostat, here’s a quick comparison of popular Emerson models:
| Model | Power Source | Display Type | Smart Features | Price Range |
|---|---|---|---|---|
| Sensi Touch | C-wire | Color Touchscreen | Wi-Fi, app control | $120–$180 |
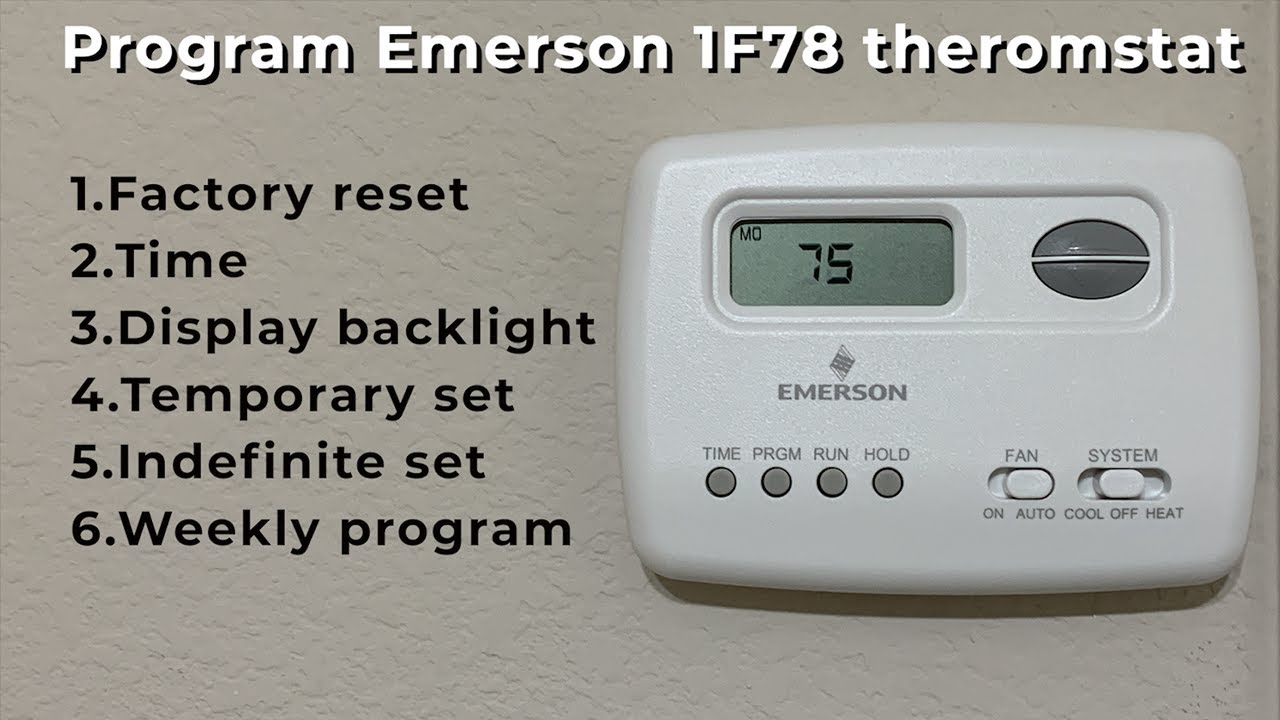
| 1F78 | Batteries or C-wire | Digital LCD | No | $35–$60 |
| Blue Series | Batteries | Blue backlit LCD | No | $40–$80 |
| 1E78 | Batteries | Basic LCD | No | $30–$50 |
Tip: Always check your HVAC compatibility before purchasing.
Credit: www.youtube.com
Useful Resources
For more information, Emerson’s official support page has detailed guides and contact options: Emerson Support. You’ll find manuals, wiring diagrams, and troubleshooting steps for every model.
Frequently Asked Questions
Why Did My Emerson Thermostat Display Suddenly Go Blank?
Most often, this is due to dead batteries or a loss of power from the HVAC system. It can also be caused by loose wiring, a blown fuse, or a tripped safety switch. Checking these basics usually reveals the cause.
How Can I Tell If My Emerson Thermostat Needs New Batteries?
If your display is dim, flickering, or unresponsive, try replacing the batteries with fresh, high-quality ones. Even if the display is still working, change the batteries every 6–12 months to avoid sudden failures.
What Should I Do If Replacing The Batteries Doesn’t Fix The Display?
Next, check that your HVAC system has power, inspect the fuse on the furnace board, and look for loose or disconnected wires. If all these are fine and the display is still blank, the thermostat may need to be replaced.
Can A Power Outage Damage My Emerson Thermostat Display?
While most thermostats survive short power outages, a strong surge or repeated outages can damage internal components or blow the fuse on your HVAC board. Using a surge protector for your system is a smart way to prevent this.
Is It Safe To Replace My Emerson Thermostat Myself?
It’s safe if you turn off power at the breaker and follow the manual closely. Always label wires before disconnecting them, and never force connections. If you’re unsure, it’s best to call a professional.
—
A blank Emerson thermostat display doesn’t always mean disaster. In most cases, a simple fix—like new batteries or a reset—gets things working again. When deeper issues are present, careful troubleshooting saves time and avoids needless costs. Remember, regular maintenance and proper installation go a long way toward preventing future problems. If you ever feel stuck, don’t hesitate to reach out to an expert or use official resources like the Emerson Support page. With the right steps, you’ll restore comfort to your home in no time.