If you use your Instant Pot regularly, you know how important the display is. The bright screen gives you key information—time, cooking modes, errors, and more. But what happens when the Instant Pot display is not working? Suddenly, you’re left guessing: Is the food cooking? Is there an error? Do you need a repair, or is it a simple fix?
Many Instant Pot owners face this problem, and it can be both confusing and frustrating. The good news is, most display issues are caused by common problems—and many can be solved at home without special tools. Sometimes the solution is as simple as checking a cable, cleaning a contact, or resetting the device.
This article explains why the Instant Pot display may stop working, how to diagnose the issue, and what you can do to fix it. You’ll also learn when it’s better to contact customer support, and how to prevent future problems. Whether you own a Duo, Ultra, or Pro model, you’ll find clear steps and real-life examples to help you get your Instant Pot working again.
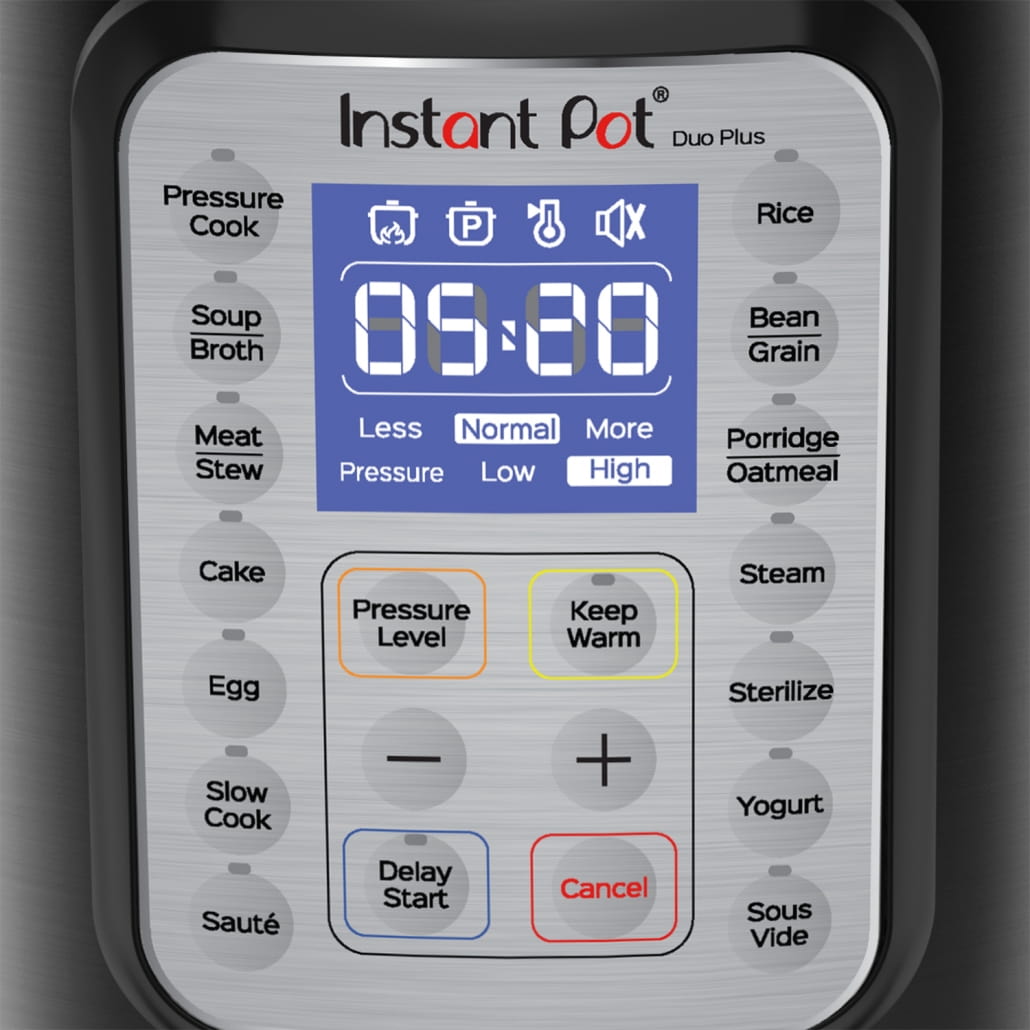
Why The Instant Pot Display Matters
The display on your Instant Pot is not just a screen—it’s the main way you interact with the device. It shows:
- Selected cooking mode (Pressure Cook, Rice, Yogurt, etc.)
- Time left in the cycle
- Temperature and pressure status
- Error codes (like C6, Lid, or burn)
- Menu and settings
A working display keeps you informed, ensures your food cooks properly, and helps you catch errors before they cause bigger issues. When the display is blank or unreadable, cooking becomes guesswork.
Common Reasons Why Your Instant Pot Display Is Not Working
Many things can cause the display to stop working. Some are simple, others more serious.
1. Power Supply Issues
If your Instant Pot doesn’t get power, the display stays dark. This is often caused by a loose plug, faulty outlet, or damaged power cord.
2. Blown Fuse Or Tripped Circuit
Inside the Instant Pot is a small fuse that protects the device from electrical surges. If this fuse blows, the display will not light up.
3. Faulty Control Panel Or Motherboard
The display connects to the main control board. If this board fails, the screen may stop working.
4. Moisture Or Spills
Liquids can seep into the display or buttons, causing short circuits or corrosion.
5. Burnt-out Display
Like any electronic screen, the Instant Pot’s display can burn out with age or heavy use.
6. Loose Or Damaged Wiring
Internal cables may come loose or break, especially after rough handling or drops.
7. Display Contrast Setting Too Low
On some models, the brightness or contrast can be set too low, making the display hard to read.
8. Software Glitches
Rarely, a glitch in the Instant Pot’s firmware can cause the display to freeze or go blank.
Not every display problem means your Instant Pot is broken forever. Many are quick to fix if you know what to look for.
Quick Checks Before Troubleshooting
Before you take your Instant Pot apart or call for help, try these quick checks:
- Test the wall outlet: Plug something else (like a lamp) into the outlet to make sure it works.
- Check the power cord: Inspect the cord for cuts, burns, or kinks. Replace if damaged.
- Try another outlet: Sometimes the problem is with your kitchen circuit, not the Instant Pot.
- Reset the device: Unplug the Instant Pot for 5 minutes, then plug it back in.
These simple steps solve many display issues. If the screen is still blank, read on for more in-depth troubleshooting.
Step-by-step Troubleshooting For A Blank Or Dead Display
Fixing a dead display starts with careful observation. Here’s how to diagnose and potentially fix the problem:
1. Check For Signs Of Power
Look for any lights, sounds, or heat from the base. If you see or hear nothing, it’s likely a power supply problem.
What to do:
- Try a different power cord if you have one (some models use a detachable cord).
- Inspect the plug and socket for burns or discoloration.
- If you’re comfortable, test the outlet with a voltage tester.
If you detect no power at all, move to the next step.
2. Inspect The Fuse
Many Instant Pots have a thermal fuse inside the base that can blow during a power surge or after overheating.
How to check:
- Unplug the Instant Pot.
- Turn the base upside down.
- Remove the screws (usually 4–6) and carefully lift the bottom plate.
- Locate the fuse (small cylinder near where the power cord enters).
If the fuse looks burnt or broken, it likely needs to be replaced. This is a common issue after a power outage.
> Tip: Fuses are usually cheap (under $5), but you need the exact type. Check your Instant Pot’s manual or search your model number online.
3. Examine The Display Panel
If you see faint text or partial lighting, the display itself may be faulty.
- Shine a flashlight at an angle to the screen. If you see numbers, the backlight may be out.
- Check for moisture, stains, or cracks.
On many models, the display can be replaced, but it’s a technical job. If you’re not sure, it’s best to contact support.
4. Reset The Instant Pot
Some models have a reset function:
- Unplug the unit.
- Hold down the Cancel and Keep Warm buttons at the same time.
- Plug the unit back in while holding the buttons.
- Wait 10 seconds, then release.
If the display comes back, it was a simple software freeze.
5. Look For Error Codes
Sometimes the display lights up but only shows an error (like C6 or noPr). These codes point to specific problems. Check your user manual or the Instant Pot website for an explanation.
6. Inspect For Water Or Spills
Check under and around the control panel for signs of moisture. Even a small spill can cause a short.
- Dry any wet areas with a soft cloth.
- Let the Instant Pot air dry for 24 hours before plugging it in again.
> Non-obvious insight: Many owners don’t realize steam from cooking can condense and drip into the display over time, especially if the device is stored near a sink or window.
7. Test Internal Connections
If you feel confident opening the base, check for loose wires or connectors between the display, control board, and power input. Push all connections firmly into place.
Caution: Opening your Instant Pot may void the warranty.
Instant Pot Models And Display Differences
Not all Instant Pots use the same display technology. The way you fix a display issue depends on the model.
Here’s a comparison of popular models and how their displays differ:
| Model | Display Type | Common Display Problems |
|---|---|---|
| Duo | LED (red digits) | Dim display, dead screen |
| Ultra | LCD (blue/white) | Flicker, partial pixels |
| Pro | LCD (color) | Contrast issues, software freeze |
| Viva | LED | Burnt-out segments |
| Lux | LED | Loose cable, dead display |
Older models (like the Lux) are more likely to have simple wiring issues, while newer ones may have software-related display failures.
When The Display Is Flickering, Dim, Or Unreadable
Sometimes the display works, but you can barely read it. Common causes:
- Low voltage: Not enough power reaches the display.
- Backlight failure: The light behind the display stops working.
- Contrast setting: Some models let you adjust brightness/contrast.
What to do:
- Plug the Instant Pot into a different outlet.
- Check for extension cords or surge protectors—these can reduce voltage.
- On models with contrast settings, adjust brightness using the menu (see your manual).
> Practical tip: In kitchens with old wiring, voltage drops are common. Try moving your Instant Pot to a newer outlet.

Credit: www.altaunited.com
Error Codes That Affect The Display
Some error codes can make the display unreadable or stuck. Here’s a quick overview:
| Error Code | Meaning | Display Behavior |
|---|---|---|
| C6 | Sensor malfunction | Display shows code, won’t cook |
| Lid | Lid not closed properly | Display flashes “lid” |
| noPr | No pressure detected | Display stuck, won’t count down |
| OvHt | Overheating | Display flashes, shuts off heat |
| burn | Burn warning | Display flashes “burn” |
If you see an error code, refer to your manual. Some codes require a reset, others need repairs.
Repair Vs. Replace: What Makes Sense?
If you’ve tried all basic steps and the display is still dead, you have two choices:
- Repair the Instant Pot
- Replace with a new unit
Here are some factors to help you decide:
Cost Of Repair
- Replacing a fuse or cable: $5–$20 (DIY)
- New display panel: $30–$60 (parts only)
- Professional repair: $50–$100+
Age Of Your Instant Pot
- Under 1 year: Usually covered by warranty (free repair/replacement)
- 2–3 years: Consider repair if cost is under half the price of a new unit
- Over 4 years: Replacement may make more sense
Availability Of Parts
Some models (like Duo and Ultra) have easy-to-find parts. Others (like older Lux) may be discontinued.
Your Comfort With Diy
If you are comfortable opening electronics, you can try a DIY repair. Otherwise, contact customer support or a local appliance repair shop.
> Non-obvious insight: Many Instant Pot owners don’t realize that certain parts (like the fuse or cord) are standard and can be bought at electronics stores—not just from Instant Pot.
How To Replace A Blown Fuse In Your Instant Pot
If you have a blown fuse, you can often fix it at home. Here’s how:
- Unplug the Instant Pot and let it cool.
- Flip the base over on a soft towel.
- Remove screws and the bottom plate.
- Find the fuse (usually near the power cord input).
- Check the fuse rating (e.g., 10A, 250V).
- Remove the old fuse (clip out or unsolder).
- Install a new fuse with the same rating.
- Replace the bottom plate, screw it back in, and test.
Warning: If the new fuse blows again immediately, there is a bigger problem (like a short circuit). Stop and contact a professional.
Cleaning And Preventing Display Problems
Most display issues can be avoided with simple cleaning and care:
- Always wipe the control panel with a dry or slightly damp cloth.
- Never spray cleaner directly on the display.
- Keep the Instant Pot away from sinks and direct steam.
- Let the unit cool before cleaning.
Extra tip: If you use your Instant Pot daily, unplug it and wipe the display once a week. This prevents sticky build-up and moisture.
What To Do If The Display Works, But Buttons Don’t Respond
Sometimes the display is fine, but the buttons don’t work. This is often a sign of:
- Button panel failure
- Moisture under the buttons
- Software freeze
Try a hard reset (unplug for 10 minutes). If that doesn’t help, let the unit air dry overnight. If the problem continues, the button panel may need to be replaced.
Can You Still Use The Instant Pot Without A Working Display?
For most recipes, you need to set time and mode—so a dead display makes the Instant Pot almost impossible to use. However, some users have found “workarounds” for basic cooking:
- Set the desired mode by counting button presses (if you know the order).
- Use a kitchen timer to track cooking time manually.
This is risky, and not recommended for pressure cooking, as you can’t see error messages or status updates.
How To Prevent Future Instant Pot Display Problems
Most display failures happen because of power surges, moisture, or physical shocks. Here’s how to avoid trouble:
- Use a surge protector for your Instant Pot.
- Keep away from water and wipe up spills immediately.
- Don’t yank the cord—pull gently from the plug, not the wire.
- Store safely—avoid dropping or stacking heavy items on the Instant Pot.
- Unplug after use if you’re not using it daily.
> Non-obvious insight: Many display failures happen after lightning storms or power outages. Unplugging your Instant Pot during storms can save your device.
Warranty And Customer Support
Instant Pot usually offers a 1-year warranty on new units. If your display stops working within this period, contact support for a free repair or replacement.
What to do:
- Find your proof of purchase.
- Note your model and serial number (usually on the bottom).
- Contact Instant Pot through their official support page.
If your warranty is expired, you can still ask about spare parts or recommended repair shops.
Credit: www.altaunited.com
Examples From Real Users
Many Instant Pot owners have shared their experiences with display issues online. Here are some real-world examples:
Case 1:
Maria’s Duo display went blank after a thunderstorm. She found the fuse was burnt. Replacing the fuse fixed the problem for under $10.
Case 2:
John’s Ultra started flickering after a soup spill. He unplugged the unit, let it dry for 48 hours, and the display came back to life.
Case 3:
Priya’s Pro showed only a faint blue light. The problem was low voltage from an old kitchen outlet. Moving to a different outlet solved it.
Case 4:
Tom’s Lux display died after three years. Replacement parts were unavailable, so he upgraded to a new model.
These examples show that most display problems have a clear cause—and sometimes, a simple solution.
When To Call A Professional
If you:
- Smell burning or see smoke
- Hear buzzing or popping from inside the unit
- Have replaced the fuse but the display is still dead
- See visible damage to the circuit board
Stop using the Instant Pot and contact a professional repair shop. Trying to fix serious electrical problems yourself can be dangerous.
Comparing Fixes: Diy Vs Professional Repair
If you’re not sure whether to try fixing your Instant Pot or take it to a pro, compare the options:
| Option | Cost | Time | Risk |
|---|---|---|---|
| DIY Fuse Replacement | Low ($5–$10) | 30 minutes | Low if careful |
| DIY Display Panel | Medium ($30–$60) | 1–2 hours | Medium (may void warranty) |
| Professional Repair | High ($50+) | Few days | Low (guaranteed work) |
| Buy New | Highest ($80–$150) | Immediate | None |
If your Instant Pot is still under warranty, always contact support first.
The Role Of Firmware Updates
Some newer Instant Pot models allow firmware updates. These can fix display bugs, add features, or improve reliability.
How to check for updates:
- Visit the Instant Pot website and search for your model.
- Follow the update instructions carefully.
- Only use official firmware—never third-party files.
A failed update can cause display problems, so make sure your device is plugged in and don’t interrupt the process.

Credit: www.reddit.com
Are Display Problems Covered By Insurance?
Most home appliance warranties cover defects but not damage from power surges, moisture, or drops. If your Instant Pot was damaged during a covered event (like a lightning strike), check with your homeowner’s or renter’s insurance. You may be able to claim the loss.
Frequently Asked Questions
Why Did My Instant Pot Display Suddenly Go Blank?
The most common reasons are power supply issues, a blown fuse, or a tripped circuit. Sometimes moisture or a software glitch can also cause the display to go blank.
Can I Fix A Dead Instant Pot Display Myself?
If the problem is a blown fuse, loose cable, or minor moisture, you can often fix it at home. However, if the display or control board is faulty, it’s best to contact a professional or Instant Pot support.
Is A Dead Display Always A Sign Of A Broken Instant Pot?
Not always. Many times, the problem is external (outlet, cord, fuse) or minor (contrast too low). A dead display does not always mean the device is permanently broken.
How Can I Avoid Display Problems In The Future?
Protect your Instant Pot from power surges with a surge protector, keep it dry, unplug after use, and avoid dropping or pulling the cord. Regular cleaning also helps.
Should I Repair Or Replace My Instant Pot If The Display Is Dead?
If your Instant Pot is new or the repair is cheap, fixing it makes sense. For older units or expensive repairs, replacement is usually the better choice.
A non-working display is frustrating, but with the right steps, most Instant Pot owners can diagnose and fix the problem quickly. If in doubt, always reach out to Instant Pot customer support or a professional repair shop. With proper care, your Instant Pot can serve you well for years to come.